[프로토타입&클래스] 더 알아보기
1. 객체 생성자란?
- 함수를 통해서 새로운 객체를 만들고, 그안에 넣고싶은 값 또는 함수를 구현할 수 있게해준다.
- 함수 이름은 대문자를 사용하고, new라는 키워드를 사용한다.
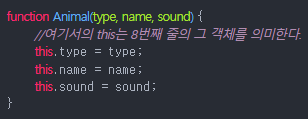
function Animal(type, name, sound) {
//여기서의 this는 8번째 줄의 그 객체를 의미한다.
this.type = type;
this.name = name;
this.sound = sound;
this.say = function () {
console.log(this.sound);
};
}
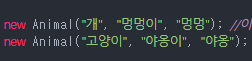
const dog = new Animal("개", "멍멍이", "멍멍"); //이 순간 하나의 객체가 만들어진다.
const cat = new Animal("고양이", "야옹이", "야옹");
dog.say(); //멍멍
cat.say(); //야옹지금 코드를 보게된다면, 11번째줄 dog와 12번재줄 cat이 만들어질때마다, new Animal이 호출이되면서

this.say <-새로운 함수가 호출이 되고있다.
그리고 this라는 값에 this.type , this.name, this.sound가 들어가지고있는데,
여기 조금 비효율적인게 뭐냐면
새로운 Animal이 만들어질때마다 새로운 함수가 만들어지고있다는 것이다.
그런데, 함수의 내용은 똑같지 않은가~?
그러니까.. this.type , this.name, this.sound의 경우는
각 Animal마다 다른 값을 가지고 있을텐데
this.say라는 함수는 똑같은 내용(로직)인데, 2번이나 선언이되고있다.
그래서 this.say는 중복되는 함수니까 밖으로 꺼내서 재사용하는 로직을 만들자.
여기서 프로토타입이라는 것을 쓸것이다.
//'객체 생성자'를 만들때는 주로 '대문자'로 시작한다.

function Animal(type, name, sound) {
    //여기서의 this는 8번째 줄의 그 객체를 의미한다.
    this.type = type;
    this.name = name;
    this.sound = sound;
    // this.say = function () {
    //     console.log(this.sound);
    // };
}

Animal.prototype.say = function () {
    console.log(this.sound);
};

const dog = new Animal("개", "멍멍이", "멍멍"); //이 순간 하나의 객체가 만들어진다.
const cat = new Animal("고양이", "야옹이", "야옹");

dog.say(); //멍멍
cat.say(); //야옹
prototype을 사용한 코드가 아래와같이 추가되었다.
Animal.prototype.say = function () {
console.log(this.sound);
};
그럼, 얘는 어떻게 한거랑 똑같은걸까?
//'객체 생성자'를 만들때는 주로 '대문자'로 시작한다.

function Animal(type, name, sound) {
    //여기서의 this는 8번째 줄의 그 객체를 의미한다.
    this.type = type;
    this.name = name;
    this.sound = sound;
    // this.say = function () {
    //     console.log(this.sound);
    // };
}

// Animal.prototype.say = function () {
//     console.log(this.sound);
// };

const dog = new Animal("개", "멍멍이", "멍멍"); //이 순간 하나의 객체가 만들어진다.
const cat = new Animal("고양이", "야옹이", "야옹");

function say() {
    console.log(this.sound);
}

dog.say = say;
cat.say = say;

dog.say();
cat.say();
Animal.prototype.say = function () {
console.log(this.sound);
}; 란, 모든 Animal들한테 20번째 줄에 추가된 것 같이 "공통된 say( )라는 함수를 가지고 있게 하자~"라고
넣어주는 것과 똑같다.
그래서 굳이 함수를 넣는게 아니여도 어떤값을 함께 재사용하고싶다 라면
예를들어
//'객체 생성자'를 만들때는 주로 '대문자'로 시작한다.
function Animal(type, name, sound) {
//여기서의 this는 8번째 줄의 그 객체를 의미한다.
this.type = type;
this.name = name;
this.sound = sound;
}
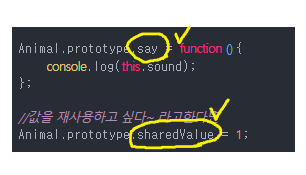
Animal.prototype.say = function () {
console.log(this.sound);
};
//값을 재사용하고 싶다~ 라고한다면
Animal.prototype.sharedValue = 1;
const dog = new Animal("개", "멍멍이", "멍멍"); //이 순간 하나의 객체가 만들어진다.
const cat = new Animal("고양이", "야옹이", "야옹");
console.log(dog.sharedValue); //1
console.log(cat.sharedValue); //1
dog.say(); //멈멍
cat.say(); //야옹14,15번째줄에 shardValue를 추가하고, 콘솔을 찍어보면 똑같이 값을 재사용 하는것을 확인할 수 있다.
따라서, prototype의 역할이 뭐냐~라고 정리를 해보면,
우리가 객체 생성자로 무언가 만들었을때
그걸로만든 객체들끼리

공유할 수 있는 어떠한 값이나 함수
그것을 자바스크립트의 객체 생성자로 만든 함수에다가 프로토타입으로 설정을 해줄수 있는것이다.
2. 객체 생성자를 상속받는 방법을 알아보자
상속 받는게 무슨뜻이냐하면,
만약 지금 Dog라는 객체 생성자 함수와
Cat이라는 객체 생성자 함수를 만든다고 해보자.
즉, 아래와 같은 상황이다.

위의 코드를 아래와같이 만들어서, 위와같이 동작했던 '멍멍', '야옹'이 출력되는
똑같은 코드를 만들어보자!

따라서 이렇게 하기 위해서는
만약 Animal이라는것을 모른다면 ? 즉, 상속받지 않는다면 아래와같이 구현을 해야되겠다.
function Dog(name, sound) {
    this.type = "개";
    this.name = name;
    this.sound = sound;
}

function Cat(name, sound) {
    this.type = "고양이";
    this.name = name;
    this.sound = sound;
}

Dog.prototype.say = function () {
    console.log(this.sound);
};

Cat.prototype.say = function () {
    console.log(this.sound);
};

const dog = new Dog("멍멍이", "멍멍");
const cat = new Cat("야옹이", "야옹");
지금, Cat이라는 객체생성자가 있고, Dog라는 객체 생성자가 있는데, 코드가 거의 똑같은데 2번이나 만드는게
별로 좋지 않아보인다 따라서 이러한 상황에 할 수 있는 것이 바로 상속이다.
그래서 다시 지우고, 이전코드로 보자면
function Animal(type, name, sound) {
    //여기서의 this는 8번째 줄의 그 객체를 의미한다.
    this.type = type;
    this.name = name;
    this.sound = sound;
}

Animal.prototype.say = function () {
    console.log(this.sound);
};

//위의 코드들은 기존코드이다.
const dog = new Dog("멍멍이", "멍멍");
const cat = new Cat("야옹이", "야옹");
그다음 Dog랑 Cat이라는 객체 생성자 함수를 만들긴할거지만, 최대한 Animal이 가지고 있는것을 재사용할 것이다.
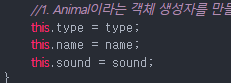
function Animal(type, name, sound) {
    //1. Animal이라는 객체 생성자를 만들었다.
    this.type = type;
    this.name = name;
    this.sound = sound;
}

// 2. prototype.say라는 함수를 Animal 객체 생성자에 넣어줬고,
Animal.prototype.say = function () {
    console.log(this.sound);
};

//3. Dog,Cat이라는 객체 생성자를 각각만들어 줄 것이기 때문이다.
//type이 필요하지않다. 왜냐면 type은 자체적으로 넣어줄 것이기 때문이다.
function Dog(name, sound) {
//5.  Animal.call을 사용한다.
//함수를 호출할때는 첫번째 파라미터에다가 'Dog객체 생성자함수에서의 this'를 넣어주고,
//그 다음 뒤로 들어오는 파라미터(type, name, sound)는 Animal의 파라미터를 의미한다.
    Animal.call(this, "개", name, sound);
}
function Cat(name, sound) {
    Animal.call(this, "고양이", name, sound);
}

//4. prototype 공유하도록하였고,
Dog.prototype = Animal.prototype;
Cat.prototype = Animal.prototype;

const dog = new Dog("멍멍이", "멍멍"); //이 순간 하나의 객체가 만들어진다.
const cat = new Cat("야옹이", "야옹");

dog.say(); //멍멍
cat.say(); //야옹
이렇게 객체 생성자 함수와 상속을 받는것, 그리고 prototype은 어떻게 사용하고 역할이 뭔지 알아봤다.
따라서 prototype역할은 어떠한 공유되는 함수나 값을 설정하는 것이고,
객체 생성자는 함수를 new키워드를 사용해서 호출하게됐을때 어떠한 새로운 객체를 만들게 되고, 그 객체 내부에 어떤type, name, sound같은 값을 집어넣을수도있고,
아니면 어떤 prototype으로 어떤 함수를 넣어서 내부에서 this를 사용해서

각 각체가 가지고있는 name이나 type이나 sound를 조회해서 기능구현을 할 수 있게 해준것이다.
class라는 기능은 c++. java, c#혹은 php와 같은 다른 프로그래밍에는 있는 기능인데,
자바스크립트는 옛날에는 아예 class라는 기능이 없었기 때문에 바로 위와 같은 코드로 class기능과 같은 비슷한 작업을 하였었다.
es6에서 class기능이 도입이되긴했지만, 다른 언어에서의 class와 똑같지는 않지만 방금 위의 코드를 조금더 간략한 문법으로 좀 더 알기 쉬운 문법으로 구현할 수 있게 해준다.
따라서 위의 코드를 class라는 문법을 사용해서 똑같이 구현을해보자.
class에서는 객체 생성자 비슷한 constructor이있다.

즉, 분홍색 주석을 보고, 14번째줄 콘솔찍으면 출력값에 say 함수가 설정되어있는것을 확인 할 수 있다.
그리고 class문법을 사용하면, 상속을 해야되는 상황에서 훨씬 더 쉽게할 수가있다.
class Animal {
    constructor(type, name, sound) {
        this.type = type;
        this.name = name;
        this.sound = sound;
    }
    //say()함수를 class내부에서 구현해주었는데, 이렇게 함수를 등록하게되면,
    //자동으로 prototype으로 등록이된다.
    say() {
        console.log(this.sound);
    }
}

//console.log(Animal.prototype.say);

//여기서 extends라는 키워드가 특정 클래스를 상속받는다 는 의미다.
class Dog extends Animal {
    //기존 Animal에서 사용하는 constructor를 덮어씌운다.
    //그과정에서 super키워드를 사용해서, Animal이 가지고있는 constructor를 먼저 호출하고나서 자신이 해야될일을
    //처리할 수가있다.
    //지금은 Dog내부에서 따로 해줘야 될게없으니까 super를 한 번만 호출해주면 끝난다.
    constructor(name, sound) {
        //super()키워드를 사용하여 자신이 상속받은 class의 constructor를 호출한다.
        super("개", name, sound);
    }
}

class Cat extends Animal {
    constructor(name, sound) {
        super("고양이", name, sound);
    }
}
const dog = new Dog("멍멍이", "멍멍");
const cat = new Cat("야옹이", "야옹");

dog.say(); //멍멍
cat.say(); //야옹
이렇게 class문법은 결국 객체생성자와 같은 constructor와 prototype을 조금 더 쉽게
사용하기 위해서 만들어진 문법이다.
이번에는 연습삼아 새로운 class를 만들어 보자!
class Food {
    constructor(name) {
        this.name = name;
        this.brands = [];
    }
    //class내부에 구현하는 함수들은 메소드라고 부른다.
    addBrand(brand) {
        this.brands.push(brand);
    }
    print() {
        console.log(`${this.name}을/를 파는 음식점들:`);
        console.log(this.brands.join(", "));
    }
}

const pizza = new Food("피자");
pizza.addBrand("피자헛");
pizza.addBrand("도미도 피자");

const chicken = new Food("치킨");
chicken.addBrand("굽네치킨");
chicken.addBrand("BBQ");

console.log(pizza); //Food { name: '피자', brands: [ '피자헛', '도미도 피자' ] }
console.log(chicken); //Food { name: '치킨', brands: [ '굽네치킨', 'BBQ' ] }

pizza.print();
//피자을/를 파는 음식점들:
//피자헛, 도미도 피자
chicken.print();
//치킨을/를 파는 음식점들:
//굽네치킨, BBQ
절자
1) Food라는 class를 만든다
2) constructor(name) <- name파라미터를 가져오게된다
어디에서?
16번줄째의 const pizza = new Food("피자");
20번줄째의 const pizza = new Food("치킨");
에서 피자, 치킨 값이 name으로 날라가는것이다.
그 뒤에 this.name = name; 으로인해 this.name에 설정이되고,
new Food("피자"); / new Food("치킨"); 라고 16번째줄/20번째줄의 new 키워드를 통해서 새로운 객체가 만들어질때,
그 안에 this.brands = [ ]; 라는 배열에 들어가있게되고, <- 24번째, 25번째줄 콘솔 찍은 결과 값들을 보면 확인할 수 있다.
3) 그리고 addBrand라는 메소드를 만들었는데, 이곳에서는
pizza.addBrand("피자헛");
pizza.addBrand("도미도 피자");
chicken.addBrand("굽네치킨");
chicken.addBrand("BBQ");
라는 문자열을 가지고와서
addBrand(brand) {
this.brands.push(brand);
}
this.brands배열에다가 넣어주는 작업을 해주었다.
4)그리고 print() 에서는 현재 가지고 있는 this.name 값과 현재의 this.brands 값을 출력을 하는 함수를 만들었다.
그래서
const pizza = new Food("피자");
pizza.addBrand("피자헛");
pizza.addBrand("도미도 피자");
const chicken = new Food("치킨");
chicken.addBrand("굽네치킨");
chicken.addBrand("BBQ");
이와같이 추가함으로써 print()를했더니,
pizza.print();
chicken.print();
//출력결과 :
//피자을/를 파는 음식점들:
//피자헛, 도미도 피자
//치킨을/를 파는 음식점들:
//굽네치킨, BBQ
와 같은 결과가 나타난것이다.
그래서 이렇게 class문법을 사용하게되면,
같은 형태를 지닌 객체들에 대해서 그 객체들의 값이라던지 객체가 가지고있는 함수라던지
그런것들이 코드관리를 조금 더 깔끔하게 할 수가 있다.