강사님이 추천해 주신 기사 :
http://www.facten.co.kr/news/articleView.html?idxno=204046
[정우현의 코인세상 뒤집어보기] 감시 자본주의로부터 벗어날 마지막 비상구 - 팩트경제신문
내가 생산한 데이터가 나의 자유를 구속한다. 블록체인은 감시 자본주의로부터 프라이버시를 구출해낼 수 있을까?파놉티콘(Panopticon)은 영국의 철학자 벤담이 제시한 감옥 구조다. 적은 수의 감
www.facten.co.kr
- 주말에 TodoList로 만들어보기
오늘은 geth와 Cmder을 설치하여 마이닝을해보았다.
https://geth.ethereum.org/downloads/
Downloads | Go Ethereum
Retrieving packages from release server...
geth.ethereum.org
Cmder | Console Emulator
Total portability Carry it with you on a USB stick or in the Cloud, so your settings, aliases and history can go anywhere you go. You will not see that ugly Windows prompt ever again.
cmder.net
실습과정은 아래와같다.
1. 바탕화면에 eth라는 폴더를 만들어준 후 안에 genesis.json파일을 넣어준다.

2. genesis.json파일의 내용은 아래와 같다.

3. 그리고, 다운받은 Cmder를 켜서 경로를 바탕화면에 eth로 이동시켜준다.
C:\Users\HKEDU\Desktop\eth
다음 아래와같이 하나하나 실행시켜주고, 필요한 부분 명령어 사용하면된다.

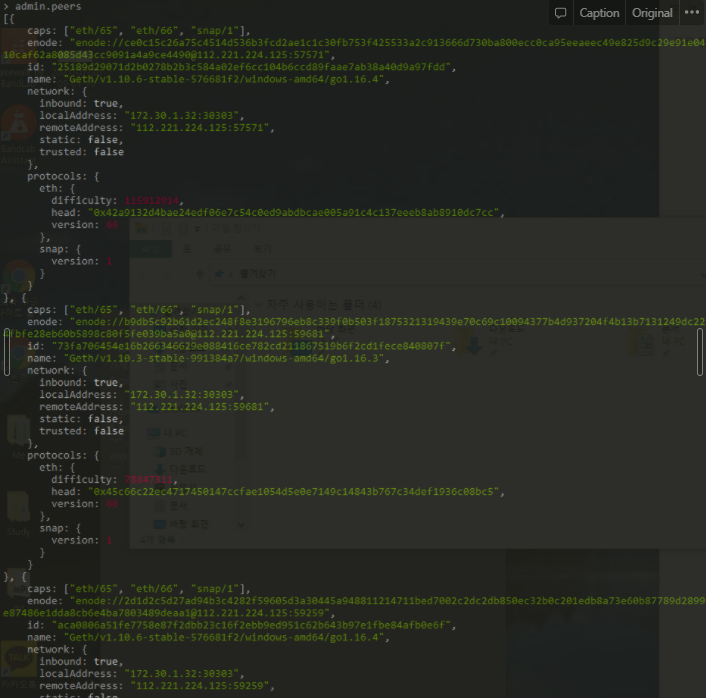
4. 강사님이랑 대의님이랑 enode로 peer가 연결된 스크린샷
이 때 , 가장 긴 블록쪽으로 붙으므로, 나는 블록이 초기화가 되어, 다시 마이닝을하였다.
오후 수업으로는 가나슈(ganache)를 install하여 웹브라우저에 인풋/아웃풋을 간단하게 구현하였다.
가나슈란 ?
가나슈(Ganache)는 이더리움 기반 블록체인 DApp 개발에 사용하는 개인용 블록체인이다.
github 참고 :
https://github.com/trufflesuite/ganache-cli
GitHub - trufflesuite/ganache-cli: Fast Ethereum RPC client for testing and development
Fast Ethereum RPC client for testing and development - GitHub - trufflesuite/ganache-cli: Fast Ethereum RPC client for testing and development
github.com
npm install -g ganache-cli
ganache-cli
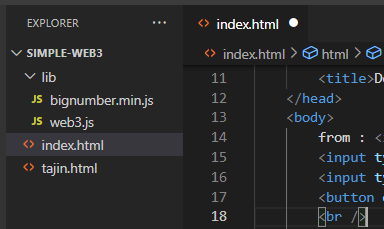
명령어로 설치 후, 나는 바탕화면폴더에 SIMPLE-WEB3 라는 폴더를 만들어주었다.
그 안에 lib폴더를 만들어주고, 아래의 web3관련 2개의 js파일을 넣어준다.

다음, 내가 구현한 코드는 아래와같다.
<!DOCTYPE html>
<html lang="en">
    <head>
        <meta charset="UTF-8" />
        <meta http-equiv="X-UA-Compatible" content="IE=edge" />
        <meta name="viewport" content="width=device-width, initial-scale=1.0" />

		<!-- web3.js를 script에 추가하였다. -->
        <script type="text/javascript" src="./lib/bignumber.min.js"></script>
        <script type="text/javascript" src="./lib/web3.js"></script>

        <title>Document</title>
    </head>
    <body>
        from : <input type="text" id="from" /> to :
        <input type="text" id="id" /> amount :
        <input type="text" id="amount" />
        <button onclick="send()">send</button>
        <br />
        <br />

        <!-- js에서 그려지는 값을 가져온다. -->
        <table id="dataTable"></table>


        <!-- script시작  -->
        <script type="text/javascript">
            if (typeof web3 !== "undefined") {
                web3 = new Web3(web3.currentProvider);
            } else {
                web3 = new Web3(
                    new Web3.providers.HttpProvider("http://localhost:8545")
                );
            }

// web3가 잘 연동됐는지 확인하는 if문
            if (web3.isConnected()) {
                console.log("connected");
            } else {
                console.log("not connected");
            }

            let accounts = web3.eth.accounts;
            console.log(accounts);


            let list = "";
            // let balance;

            for (i = 0; i < accounts.length; i++) {
                let balance =
                    web3.fromWei(web3.eth.getBalance(accounts[i])).toNumber() +
                    "ETH";

                list +=
                    '<tr><td id="test1">' +
                    accounts[i] +
                    '</td> <td id="test2">' +
                    balance +
                    "</td></tr>";
            }

            document.getElementById("dataTable").innerHTML = list;


            function send() {
                console.log("나들어왔어요");

                // console.log(_from);
                // 저기있는 사용자가 입력하는 값을 읽어와야되니까!
                //id를 사용해서 읽어온다!
                let _from = document.getElementById("from").value;
                console.log(_from);
                let _to = document.getElementById("id").value;
                console.log(_to);
                let _amount = document.getElementById("amount").value;
                console.log(_amount);
                //web3나오면 다 블록체인이라고 생각하기
                //블록체인에 전달해야되니까!
                web3.eth.sendTransaction({
                    from: _from,
                    to: _to,
                    value: web3.toWei(_amount, "ether"),
                });
            }


        </script>
    </body>
</html>
결과물 : (로컬) file:///C:/Users/HKEDU/Desktop/simple-web3/index.html

아래의 그림은 오늘 우여곡절하며, 강사님께서 그려주신 부분을 참고하여 혼자 정리해보았다.


최근댓글